- Follow the Step A until completed. Make sure to close Your Project first while doing this Step.
- Download the latest Agate GAS and extract it.
- You will find Content and Source folder, copy them to your project.
- Open YourProject.uproject (you can find it on root of Your Project) in Notepad or any text editor.
- Add below code to Modules section.
{
  "Name": "AgateGAS",
  "Type": "Runtime",
  "LoadingPhase": "Default",
  "AdditionalDependencies": [
    "Engine",
    "GameplayAbilities"
  ]
}
- It should become like this then:
{
  ...
  "Modules": [
    {
      "Name": "MyProject",
      "Type": "Runtime",
      "LoadingPhase": "Default"
    },
    {
      "Name": "AgateGAS",
      "Type": "Runtime",
      "LoadingPhase": "Default",
      "AdditionalDependencies": [
        "Engine",
        "GameplayAbilities"
      ]
    }
  ],
  ...
}
- And then open YourProject.sln solution from Visual Studio.
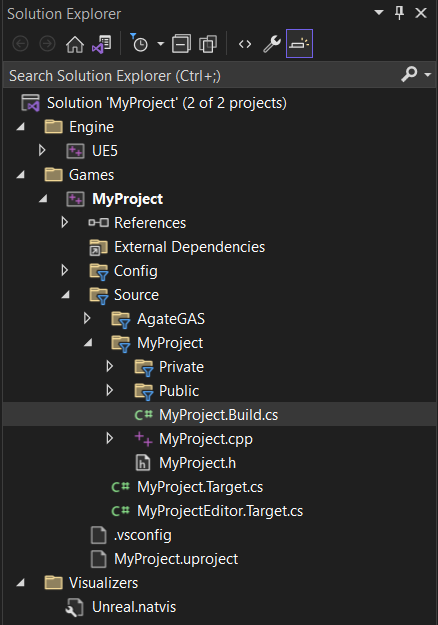
- Find YourProject.Build.cs from Solution Explorer, you should find it on Games/YourProject/Source/YourProject.
- Add "AgateGAS" at its PublicDependencyModuleNames, your code should be like this:
PublicDependencyModuleNames.AddRange(new string[] { "Core", "CoreUObject", "Engine", "InputCore", "AgateGAS" });
- And then, select Build - Rebuild solution, wait until finished.
- From Solution Explorer, move to Games/YourProject/Config/DefaultEngine.ini.
- In the bottom of [/Script/Engine.Engine], add AssetManagerClassName=/Script/AgateGAS.AGASAssetManager.

- Open Your Project in Unreal Engine again.
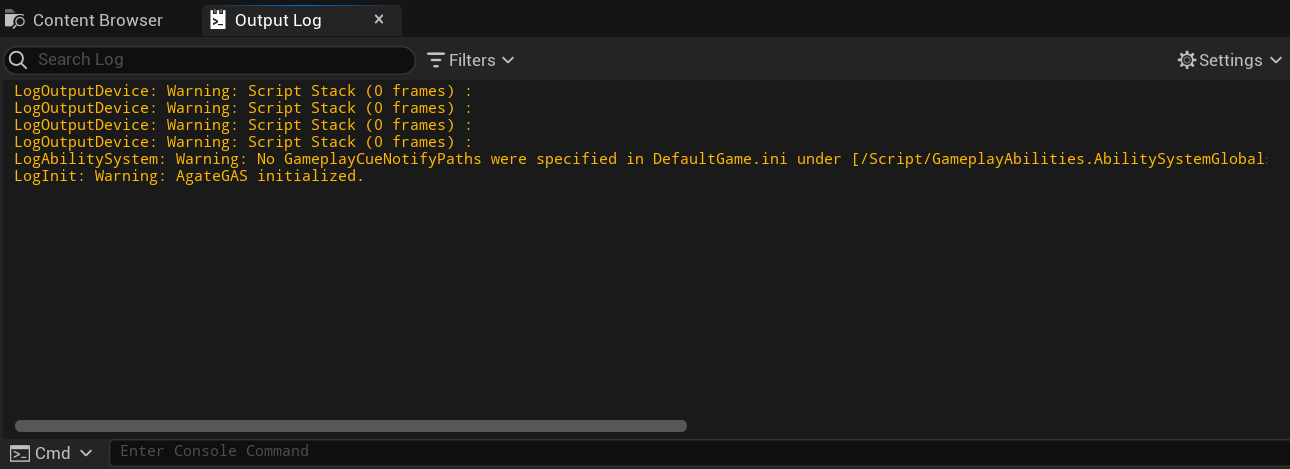
- Click play and you should see AgateGas initialized in the Output Log.
- You can also see the AgateGAS content from C++ Classes in Content Browser.