- Follow the Step A until completed. Make sure to close Your Project first while doing this Step.
- Download the latest Agate GAS and extract it.
- You will find Content and Source folder, copy them to your project. It is optional whether you want to keep the Content/AgateGASExample or not, it just contains some example of Attribute, Ability, Character, etc.
- Open YourProject.uproject (you can find it on root of Your Project) in Notepad or any text editor.
- Add below code to Modules section.
{
  "Name": "AgateGAS",
  "Type": "Runtime",
  "LoadingPhase": "Default",
  "AdditionalDependencies": [
    "Engine",
    "GameplayAbilities"
  ]
}
- It should become like this then:
{
  ...
  "Modules": [
    {
      "Name": "MyProject",
      "Type": "Runtime",
      "LoadingPhase": "Default"
    },
    {
      "Name": "AgateGAS",
      "Type": "Runtime",
      "LoadingPhase": "Default",
      "AdditionalDependencies": [
        "Engine",
        "GameplayAbilities"
      ]
    }
  ],
  ...
}
- And then open YourProject.sln solution from Visual Studio.
- Find YourProject.Build.cs from Solution Explorer, you should find it on Games/YourProject/Source/YourProject.
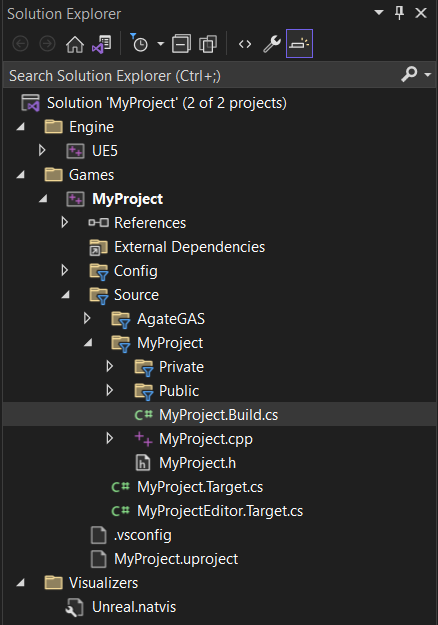
- Add "AgateGAS" at its PublicDependencyModuleNames, your code should be like this:
PublicDependencyModuleNames.AddRange(new string[] { "Core", "CoreUObject", "Engine", "InputCore", "AgateGAS" });
- And then, select Build - Rebuild solution, wait until finished.
- From Solution Explorer, move to Games/YourProject/Config/DefaultEngine.ini.
- In the bottom of [/Script/Engine.Engine], add AssetManagerClassName=/Script/AgateGAS.AGASAssetManager.

- From File Explorer, find DefaultGameplayTags.ini at YourProject/Config.
- Add these lines as replacement of InvalidTagCharacters to add some required tags. Tags used as identifier for any effect, ability, or many things, you'll become friendly with it later. Or you can also do this inside the Project Settings/GameplayTags.
InvalidTagCharacters=
+GameplayTagTableList=/Game/AgateGAS/Data/GameplayTag/DT_GameplayTagAbility.DT_GameplayTagAbility
+GameplayTagTableList=/Game/AgateGAS/Data/GameplayTag/DT_GameplayTagAnimEvent.DT_GameplayTagAnimEvent
+GameplayTagTableList=/Game/AgateGAS/Data/GameplayTag/DT_GameplayTagData.DT_GameplayTagData
+GameplayTagTableList=/Game/AgateGAS/Data/GameplayTag/DT_GameplayTagStateEffect.DT_GameplayTagStateEffect
What you've added above is called Gameplay Tags, labels that you can add and remove to your game entities to denote a state or any other particularity free to interpretation in game code.
- Open Your Project in Unreal Engine again.
- Click play and you should see AgateGas initialized in the Output Log.
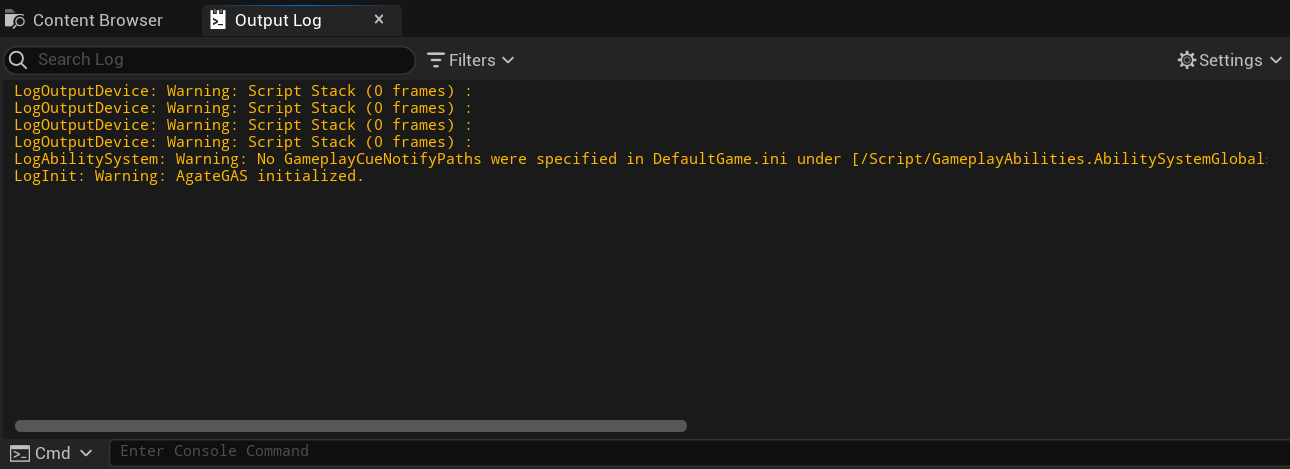
- You can also see the AgateGAS content from C++ Classes in Content Browser.


No Comments