A. Enable Gameplay Ability System in Your Project
1. Convert Your Project into C++
Note: Only do this if Your Project is still on Blueprint-Only Mode.
- Open Your Project in Unreal Engine.
- Select Tools - New C++ Class....
- You can create any class and delete it later if you don't need it.
For example, i just create a Public class named Test from None.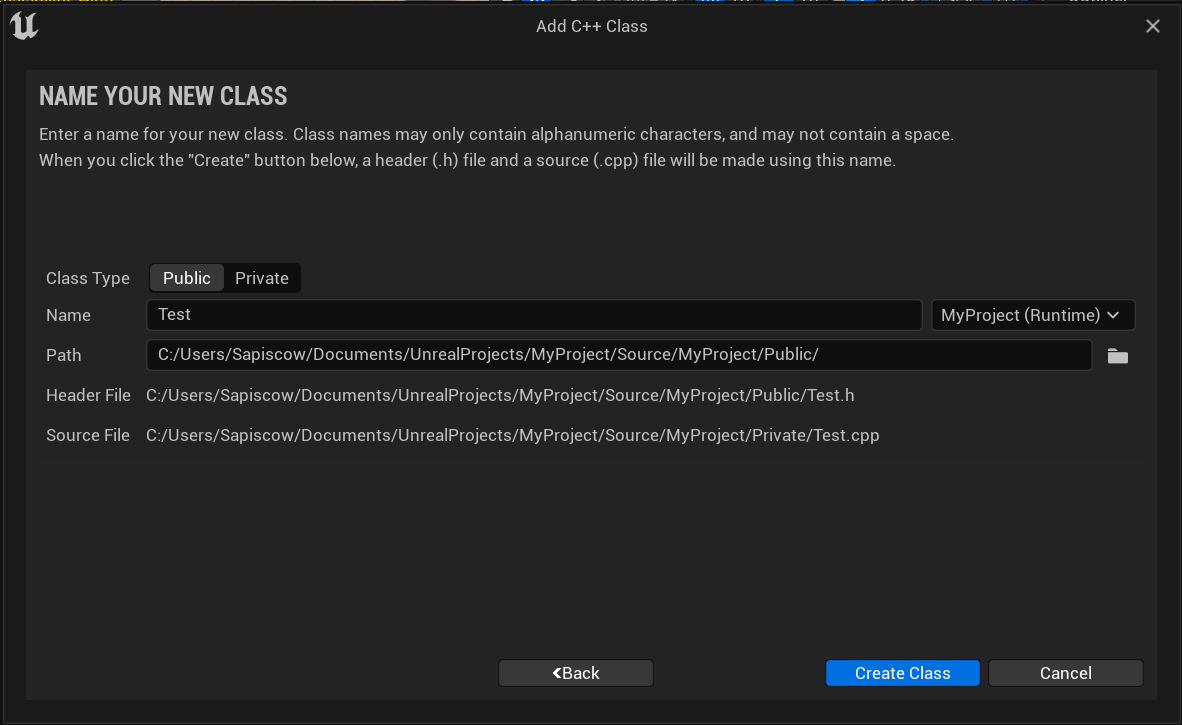
-
Restart Your Project then, you should be asked to rebuild them, and just confirm that and wait until the project is opened (there are no visual progress showed, but don't worry that).
- After Your Project is opened, it's better to turn off the Live Coding from the right bottom of editor to prevent any build conflict in Visual Studio (or other compiler that you used).

- Done, Your Project has been converted to C++.


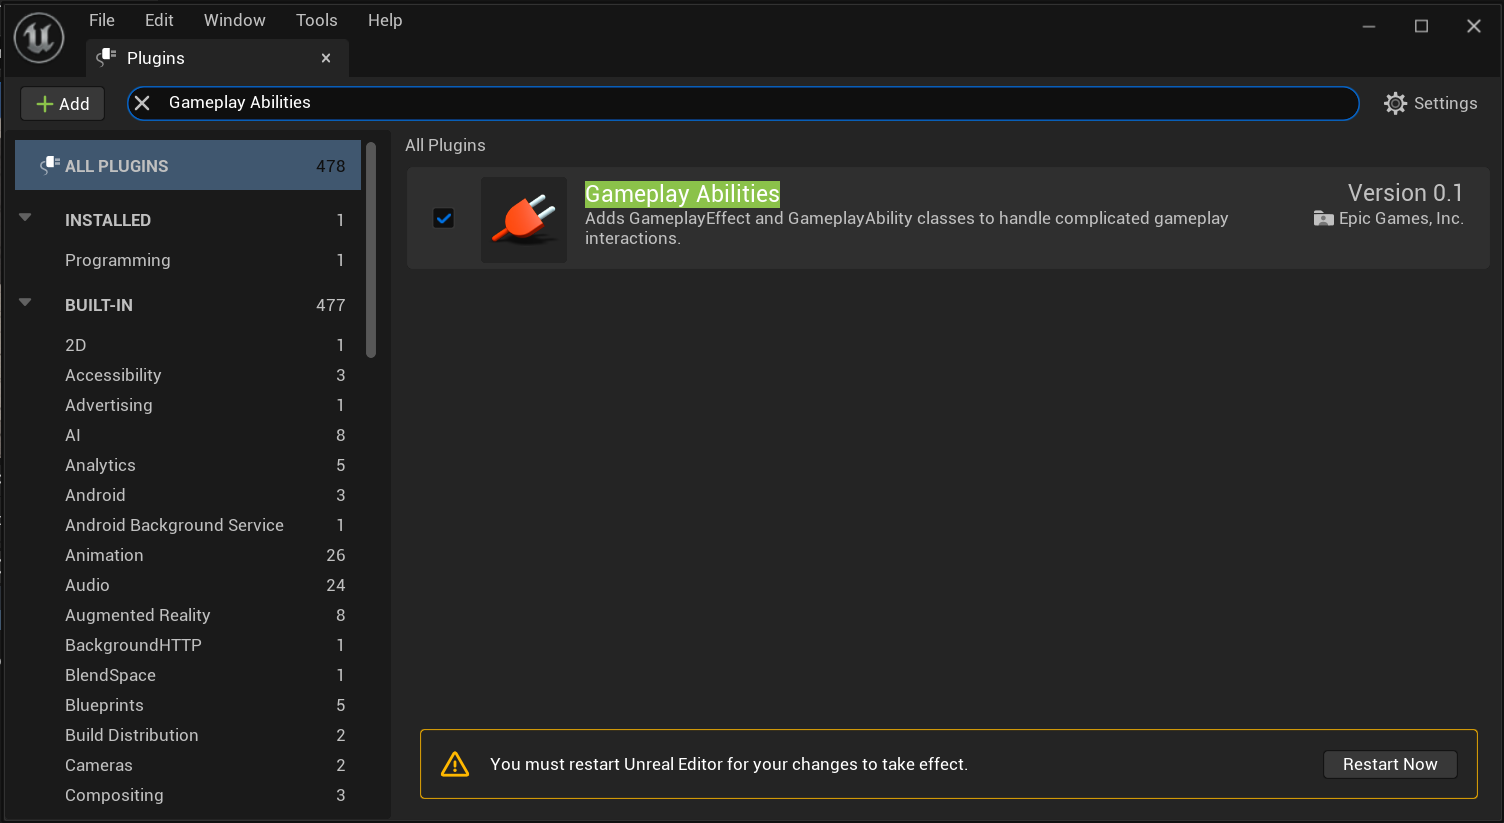
2. Enable Gameplay Abilities Plugin
- Select Edit - Plugins.
- Find Gameplay Abilities and check it to be used.

- (Optional) If you used Visual Studio, I also recommend you to check Visual Studio Integration Tools.
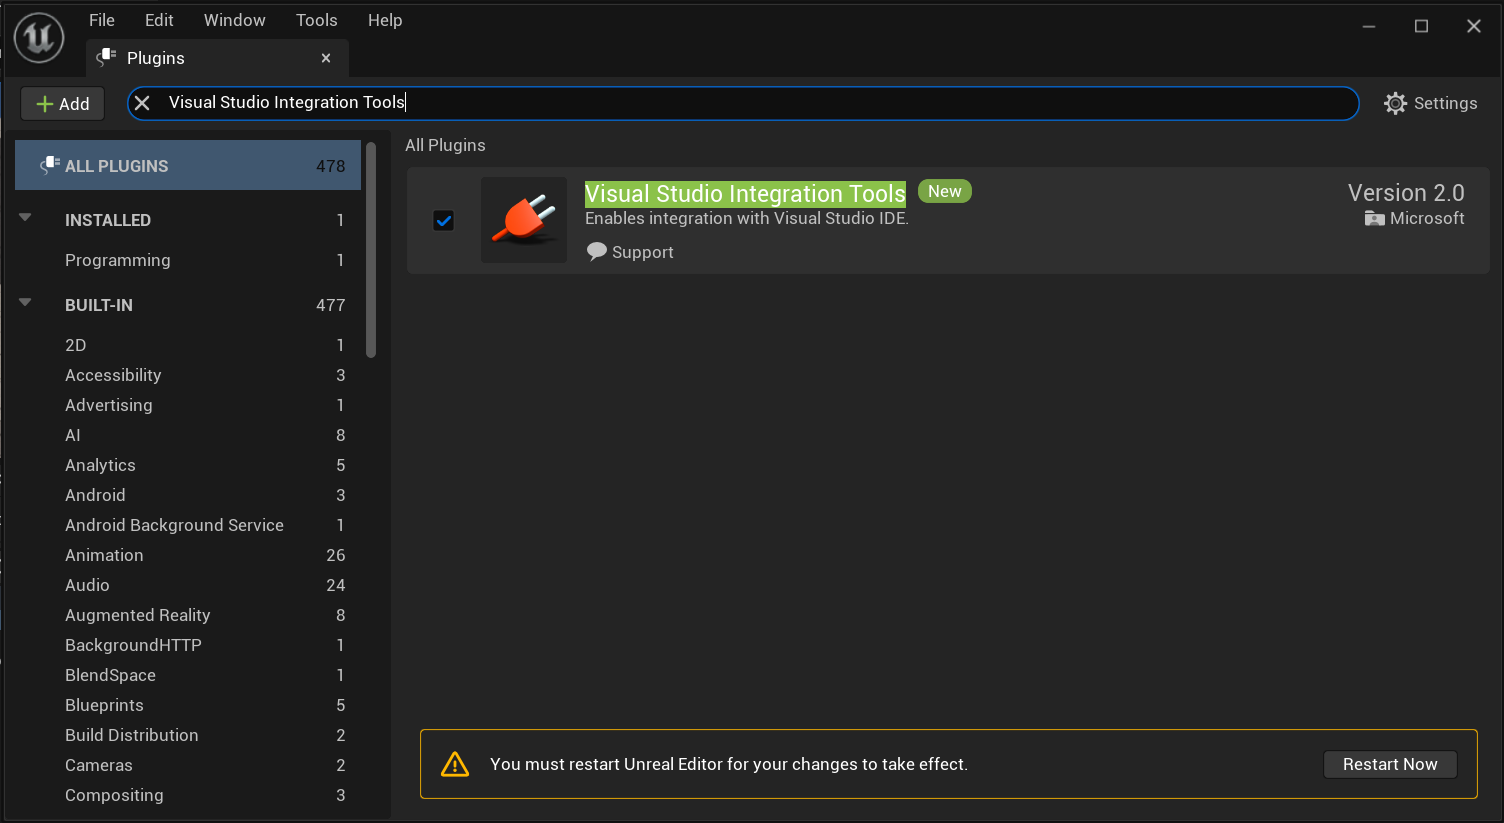
- Then select Restart Now.
Move toNext Section.